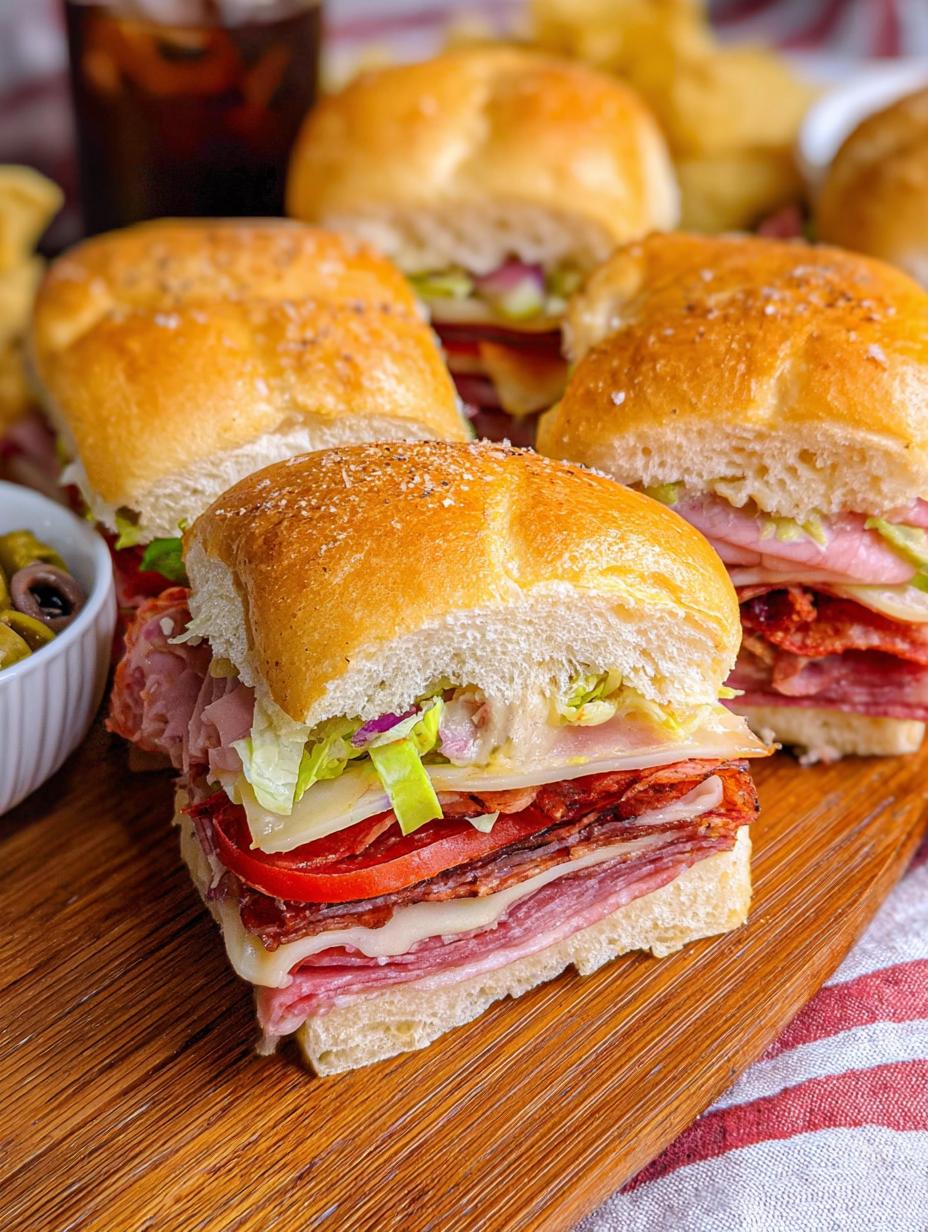
Italian Sub Sliders have become my go-to for any gathering, from Super Bowl parties to casual weekend get-togethers. I first tried making them a few years ago for a friend’s birthday, and honestly, I was a little intimidated. But this recipe is so straightforward, and the result is incredibly impressive! Imagine all the savory goodness of a classic deli sub – layers of salty meats, melty provolone, tangy peppers, all nestled in soft, buttery buns that are toasted to perfection. The aroma alone is enough to make your mouth water! This Italian sub slider recipe is a guaranteed crowd-pleaser. Ready to whip up some deliciousness? Let’s get cooking!
Why You’ll Love This Italian Sub Sliders
These aren’t just any sliders; they’re a flavor explosion waiting to happen! Here’s why you’ll be making this Italian sub slider recipe again and again:
- Effortless Assembly: Seriously, you just layer and bake. It’s that simple!
- Crowd-Pleaser Guaranteed: Perfect for game days, parties, or any event where delicious food is a must.
- Flavorful Layers: A symphony of savory meats, melty cheese, and tangy veggies in every bite.
- Quick Prep Time: Get dinner or appetizers on the table in under an hour with these easy Italian sub sliders.
- Customizable: Feel free to swap out meats, cheeses, or veggies to suit your taste.
- Irresistible Texture: Soft, buttery buns meet gooey cheese and tender fillings.
- Miniature Perfection: They’re the ideal size for snacking and sharing without the mess of a full-sized sandwich.
Ingredients for Italian Sub Sliders
Gathering these simple components is the first step to making the best Italian sub sliders. This Italian deli sliders recipe comes together quickly, and each ingredient plays a vital role in creating that classic deli flavor we all crave.
- 12 King’s Hawaiian dinner rolls – these soft, slightly sweet buns are key to the flavor profile
- 0.5 lb deli sliced ham – provides a savory, salty base
- 0.5 lb sliced salami – adds a classic Italian deli bite
- 0.25 lb sliced pepperoni – for that little kick of spice
- 12 slices provolone cheese – melts beautifully and offers a mild, creamy flavor
- 0.25 teaspoon Italian seasoning – a blend of herbs like oregano, basil, and thyme
- 2 roma tomatoes, chopped – adds a fresh, juicy element
- 0.5 red onion, chopped – for a bit of sharpness and crunch
- 0.5 cup sliced pepperoncini peppers, drained – these bring the essential tangy, slightly spicy note
- 3 tablespoons butter – melted for brushing the tops
- 2 tablespoons dijon mustard – adds a wonderful tang to the butter mixture
- 0.25 teaspoon garlic powder – for a hint of savory garlic flavor
- 0.25 teaspoon Italian seasoning – more herb goodness for the topping
- 1 teaspoon grated parmesan cheese – for a salty, nutty finish
- 1.5 cups shredded lettuce – added after baking for freshness
How to Make Italian Sub Sliders
Ready to assemble these delicious Italian sub sliders? It’s a surprisingly simple process that yields incredibly flavorful results. Follow these easy steps to create the best Italian deli sliders for your next gathering!
- Step 1: Preheat your oven to 350°F (175°C). Line a baking sheet with parchment paper for easy cleanup. This initial step ensures your sliders bake evenly.
- Step 2: Take your King’s Hawaiian dinner rolls and carefully slice them in half horizontally. Try to keep them connected so they bake as one unit.
- Step 3: Place the bottom half of the rolls onto the prepared baking sheet. This forms the base for all our delicious fillings.
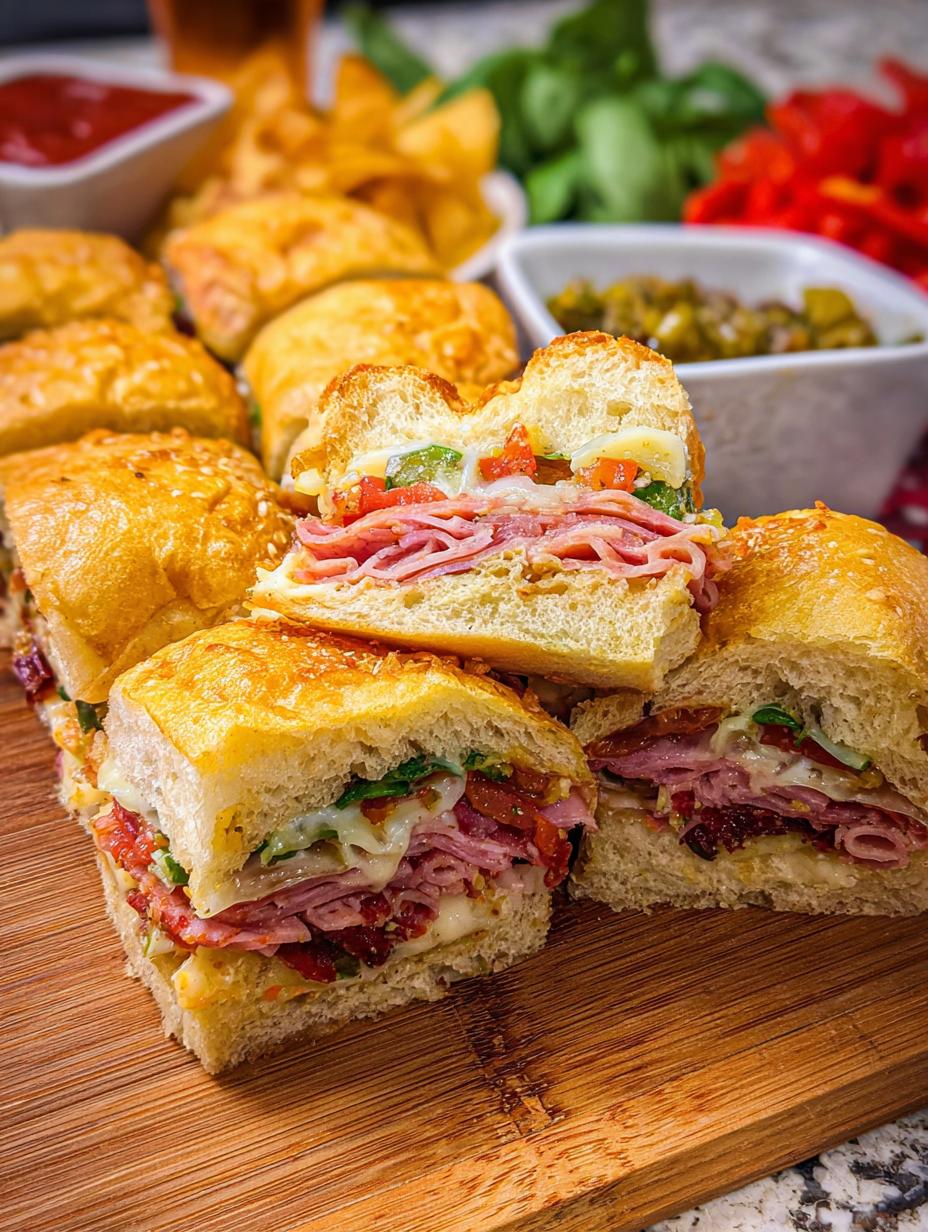
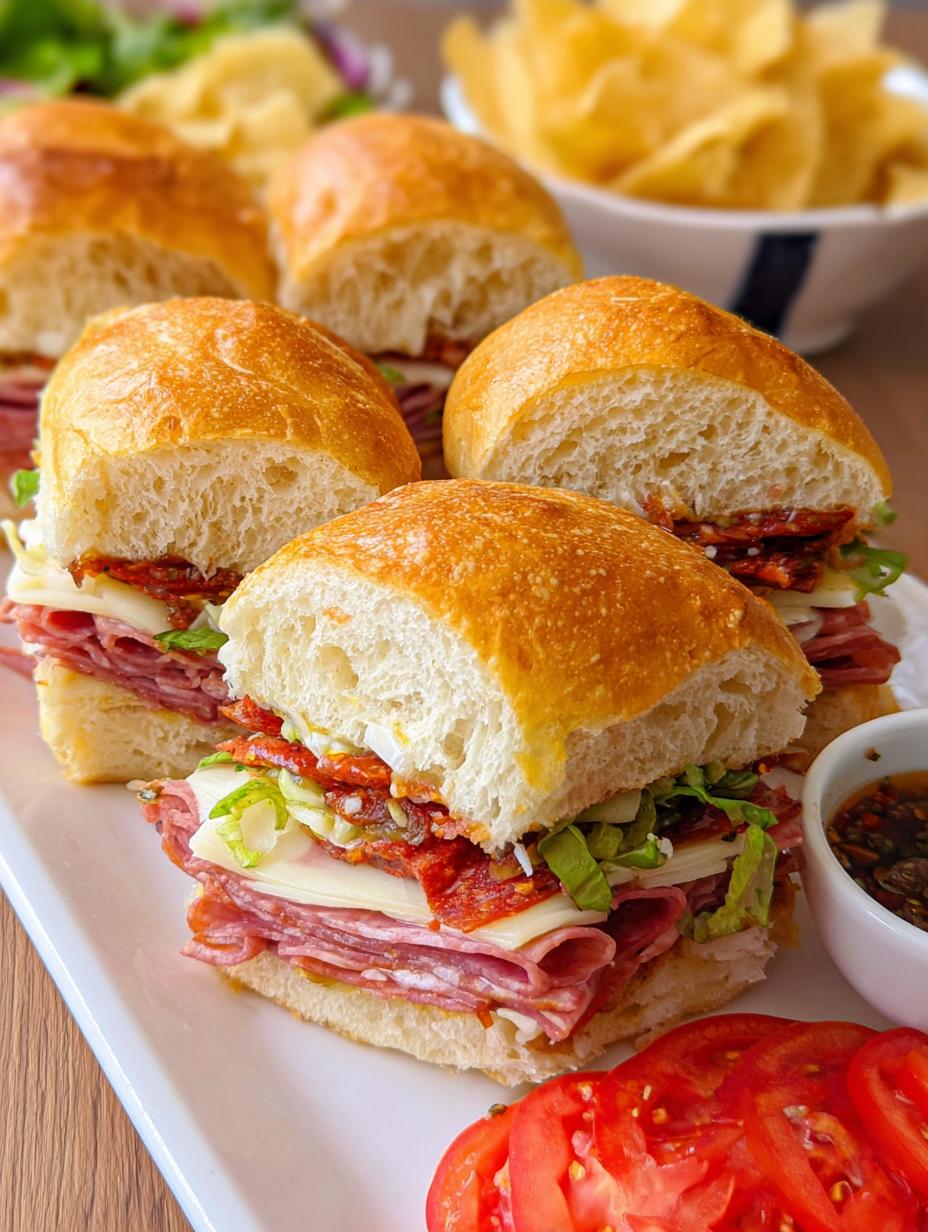
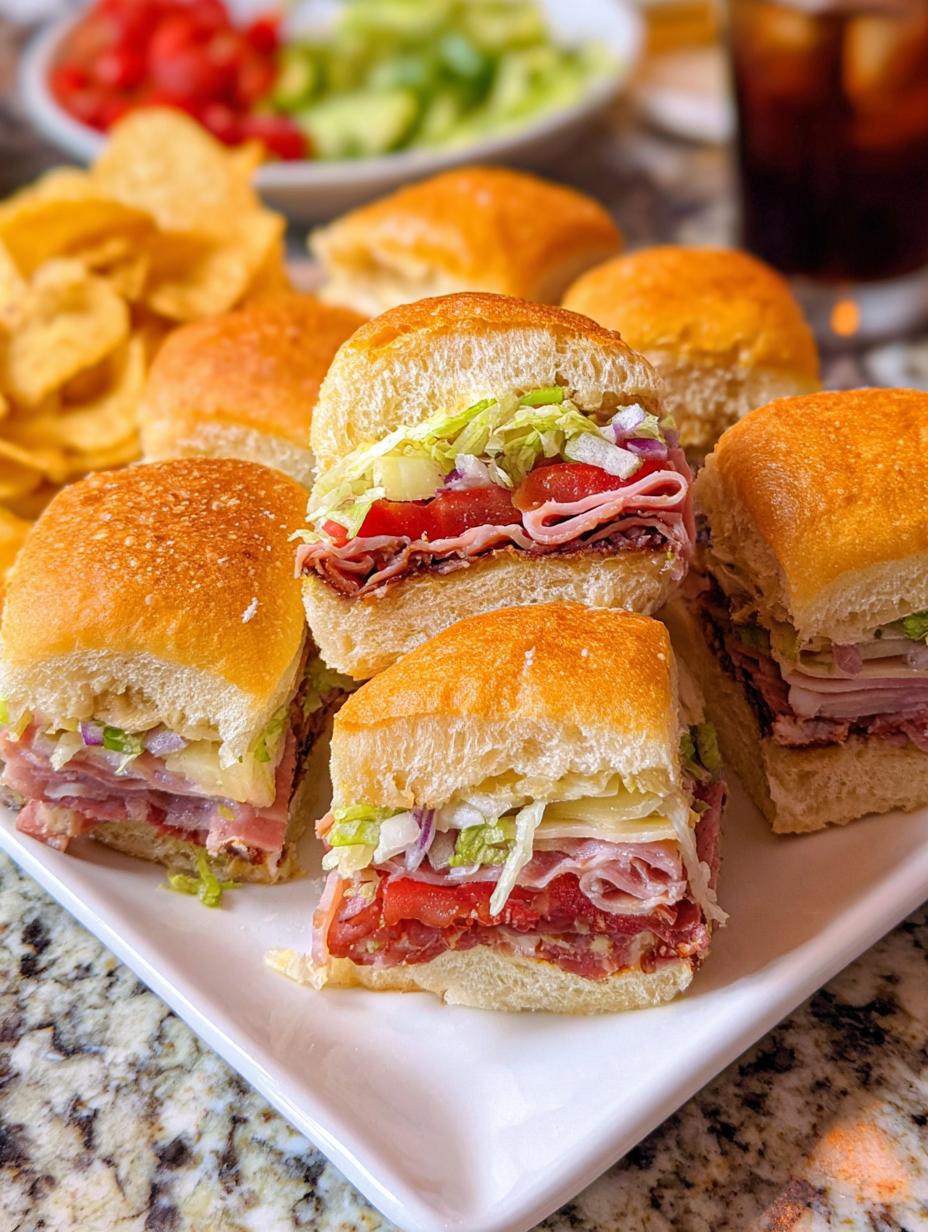
- Step 4: Begin layering your meats. Start with the deli sliced ham, then add the salami, and finish with the pepperoni. This creates a robust, savory foundation.
- Step 5: Add a layer of provolone cheese over the meats, ensuring good coverage. Sprinkle evenly with 0.25 teaspoon Italian seasoning.
- Step 6: Distribute the chopped roma tomatoes, chopped red onion, and drained sliced pepperoncini peppers over the cheese. This adds freshness and that essential tangy bite.
- Step 7: Gently place the top buns back onto the assembled fillings, completing the sandwich structure.
- Step 8: In a small microwave-safe bowl, combine the 3 tablespoons butter, 2 tablespoons dijon mustard, 0.25 teaspoon garlic powder, and 0.25 teaspoon Italian seasoning. Microwave for about 10 seconds until the butter is melted, then stir until well combined. The aroma of this buttery mixture is amazing!
- Step 9: Generously brush this flavorful buttery mixture evenly over the tops of the rolls. Then, sprinkle with the 1 teaspoon grated parmesan cheese for an extra layer of salty goodness.
- Step 10: Tent the baking sheet loosely with foil. Bake in the preheated oven for 15–20 minutes, or until the cheese is gloriously melted.
- Step 11: Carefully remove the foil. Continue baking for another 5 minutes to get those tops perfectly toasted and golden.
- Step 12: Take the sliders out of the oven. Lift off the top buns and spread the 1.5 cups shredded lettuce evenly over the fillings. This adds a cool, crisp contrast.
- Step 13: Pop the top buns back on and serve these delightful Italian sub sandwich sliders warm. Enjoy the burst of flavors!
Pro Tips for the Best Italian Sub Sliders
Want to elevate your Italian deli sliders game? These tips will help you create the most flavorful and satisfying bites every time. Making DIY Italian sub sliders is easier than you think with a few insider tricks.
- Don’t skip the butter-dijon mixture on top; it’s crucial for that golden, savory crust.
- For extra flavor, toss the chopped tomatoes, onions, and pepperoncini with a tablespoon of Italian dressing before layering.
- Ensure your deli meats and cheeses are sliced thinly for even cooking and easy biting.
- If you don’t have Hawaiian rolls, brioche or even regular slider buns work, but adjust baking time slightly.
What’s the secret to perfect Italian Sub Sliders?
The secret to truly perfect Italian sub sliders lies in the buttery, mustardy topping brushed on the buns and a two-stage baking process. This ensures a golden, toasted exterior with perfectly melted fillings inside.
Can I make Italian Sub Sliders ahead of time?
Yes! You can assemble the sliders completely, minus the butter topping and lettuce, up to 24 hours in advance. Store them covered in the refrigerator. Add the topping and bake as directed, adding a few extra minutes.
How do I avoid common mistakes with Italian Sub Sliders?
A common pitfall is over-baking, which dries out the rolls. Make sure to tent with foil initially. Also, avoid overstuffing; too many fillings can make them messy and unevenly cooked.
Best Ways to Serve Italian Sub Sliders
These savory Italian sub sliders are so versatile, they fit right into any meal plan. They’re fantastic as a hearty appetizer for parties, making them a favorite for party Italian sub sliders. For game day, they’re the perfect handheld bite that won’t slow down the fun. You can also serve them as a main course for a casual lunch or dinner, paired with a fresh green salad or a bowl of minestrone soup for a complete Italian feast. Don’t forget a side of crispy potato chips or some tangy pickles to round out the deliciousness!
Nutrition Facts for Italian Sub Sliders
When you’re craving a taste of the deli without a full-sized sandwich, these Italian sub sliders hit the spot. Each bite offers a burst of classic Italian flavors. Remember that these numbers for mini Italian subs are estimates, as ingredient choices can vary. For more information on nutritional guidelines, you can refer to resources like the National Nutrition Guidelines.
- Serving Size: 1 slider
- Calories: Estimated 300-400
- Fat: Estimated 15-25g
- Saturated Fat: Estimated 5-10g
- Unsaturated Fat: Estimated 10-15g
- Trans Fat: Estimated 0-1g
- Carbohydrates: Estimated 25-35g
- Fiber: Estimated 1-2g
- Sugar: Estimated 5-10g
- Sodium: Estimated 800-1200mg
- Protein: Estimated 15-25g
- Cholesterol: Estimated 50-80mg
Nutritional values are estimates and may vary based on specific ingredients used and portion sizes.
How to Store and Reheat Italian Sub Sliders
Even though these Italian sub sliders are best enjoyed fresh, you might have leftovers, or you might want to prep them ahead. Luckily, storing and reheating these tasty mini Italian subs is super easy! Once cooled completely, store any leftover Italian sub bites in an airtight container. They’ll keep well in the refrigerator for about 3 to 4 days. If you’re planning further ahead, these sliders also freeze beautifully! Wrap them tightly in plastic wrap, then in foil, and they can stay frozen for up to 3 months. To reheat, you can pop them in a preheated 350°F oven for about 10-15 minutes until warmed through, or use the microwave in short bursts, being careful not to overcook and dry them out.
Frequently Asked Questions About Italian Sub Sliders
What are Italian sub sliders?
Italian sub sliders are essentially miniature versions of classic Italian deli sandwiches, baked together in a tray of soft rolls. They pack all the savory meats, melty cheese, and tangy toppings of a traditional sub into a convenient, bite-sized format perfect for sharing. They’re a fantastic way to enjoy big Italian sandwich flavors in a smaller, more manageable package.
Can I make these Italian sub sliders ahead of time?
Yes, you absolutely can! For the best results, assemble your Italian deli sliders completely, but hold off on brushing the butter mixture and adding the lettuce until just before baking. Store them covered in the refrigerator for up to 24 hours. When ready to bake, add the butter topping and lettuce, and you might need to add an extra 5 minutes to the baking time.
What kind of bread is best for Italian sub sliders?
While King’s Hawaiian dinner rolls are fantastic for their soft texture and hint of sweetness, you can use other breads too. Regular slider buns, brioche rolls, or even good quality yeast dinner rolls will work well for these mini Italian subs. The key is a soft roll that can hold its shape and absorb the buttery topping.
How do I ensure the cheese is perfectly melted in my Italian sub sliders?
The trick to perfectly melted cheese in your Italian sub sandwich sliders is a combination of tenting with foil and a final quick bake uncovered. Tenting traps steam, which helps the cheese melt evenly without burning the tops of the rolls. Removing the foil for the last 5 minutes allows the cheese to get bubbly and slightly browned.
Variations of Italian Sub Sliders You Can Try
While this classic Italian sub slider recipe is a winner, don’t be afraid to get creative! Here are a few Italian sub slider ideas to mix things up:
- Spicy Italian Sub Sliders: Amp up the heat by adding a pinch of red pepper flakes to the butter mixture or using spicy capicola and hot pepper rings.
- Vegetarian Italian Sub Sliders: Swap the meats for grilled zucchini, roasted red peppers, and marinated artichoke hearts. Add a sprinkle of smoked mozzarella for extra flavor.
- Chicken Parmesan Sliders: Use breaded chicken cutlets instead of deli meats, top with marinara sauce and mozzarella cheese, and bake.
- Breakfast Italian Sub Sliders: Fill with scrambled eggs, breakfast sausage or bacon, and cheddar cheese for a hearty morning meal.
For more inspiration on party foods, check out these party ideas. If you’re looking for quick and easy recipes, this recipe might be of interest.
Print
Amazing Italian Sub Sliders Recipe
- Total Time: 35 minutes
- Yield: 12 servings 1x
- Diet: Vegetarian
Description
These easy Italian sub sliders are everything you love about a classic deli sandwich – stacked meats, melty cheese, tangy peppers, and a buttery toasted top – all baked together in one warm, pull-apart tray. Perfect for game days, parties, or busy weeknights when you need something hearty but low effort.
Ingredients
- 12 King’s Hawaiian dinner rolls
- 0.5 lb deli sliced ham
- 0.5 lb sliced salami
- 0.25 lb sliced pepperoni
- 12 slices provolone cheese
- 0.25 teaspoon Italian seasoning
- 2 roma tomatoes, chopped
- 0.5 red onion, chopped
- 0.5 cup sliced pepperoncini peppers, drained
- 3 tablespoons butter
- 2 tablespoons dijon mustard
- 0.25 teaspoon garlic powder
- 0.25 teaspoon Italian seasoning
- 1 teaspoon grated parmesan cheese
- 1.5 cups shredded lettuce
Instructions
- Preheat your oven to 350°F and line a baking sheet with parchment paper.
- Slice the rolls in half horizontally while keeping them connected.
- Place the bottom half of the rolls on the prepared baking sheet.
- Layer the ham, then the salami, and finish with pepperoni.
- Add a layer of provolone cheese and sprinkle with Italian seasoning.
- Top with chopped tomatoes, red onions, and pepperoncini peppers.
- Place the top buns back on.
- In a small microwave-safe bowl, combine the butter, dijon mustard, garlic powder, and Italian seasoning. Microwave for about 10 seconds until melted and stir.
- Brush the buttery mixture evenly over the tops of the rolls and sprinkle with parmesan cheese.
- Tent with foil and bake for 15–20 minutes, until the cheese is melted.
- Remove the foil and bake for another 5 minutes for toasted tops.
- Remove the sliders from the oven, lift off the top buns, and add the shredded lettuce.
- Pop the tops back on and serve warm.
Notes
- Leftovers can be refrigerated in an airtight container for up to 3 days. Reheat in the microwave in 1-minute bursts.
- You can swap meats, cheeses, and vegetables to your preference.
- Regular yeast dinner rolls or brioche slider buns can be used as an alternative to Hawaiian rolls.
- Toss the vegetable mix in Italian dressing for extra flavor.
- Add chopped cooked bacon or bell peppers for variations.
- Serve with potato chips, pickles, a green salad, or antipasto skewers.
- Prep Time: 10 minutes
- Cook Time: 25 minutes
- Category: Appetizer
- Method: Baking
- Cuisine: Italian
Nutrition
- Serving Size: 1 slider
- Calories: Estimated 300-400
- Sugar: Estimated 5-10g
- Sodium: Estimated 800-1200mg
- Fat: Estimated 15-25g
- Saturated Fat: Estimated 5-10g
- Unsaturated Fat: Estimated 10-15g
- Trans Fat: Estimated 0-1g
- Carbohydrates: Estimated 25-35g
- Fiber: Estimated 1-2g
- Protein: Estimated 15-25g
- Cholesterol: Estimated 50-80mg
Keywords: Italian Sub Sliders, Italian sub slider recipe, Mini Italian subs, Italian sub bites, How to make Italian sub sliders, Easy Italian sub sliders, Best Italian sub sliders, Italian deli sliders, Small Italian subs, Italian sub sandwich sliders, DIY Italian sub sliders, Italian sub slider ingredients, Savory Italian sub sliders, Party Italian sub sliders, Italian sub slider ideas, Flavorful Italian sub sliders, Quick Italian sub sliders, Homemade Italian sub sliders, Italian sub sliders for lunch, Italian sub sliders for dinner