Butterfinger Puppy Chow Treat has been my go-to recipe for years when I need a quick, crowd-pleasing snack that tastes like childhood nostalgia. I remember my mom making a version of this when I was a kid, and the sweet, salty, crunchy goodness always made me so happy. This particular Butterfinger puppy chow recipe takes that classic flavor and makes it even more irresistible by incorporating actual Butterfinger candy pieces. The combination of crispy cereal, rich chocolate-peanut butter coating, and that signature Butterfinger crunch is pure magic. It’s the perfect homemade dog treat with Butterfinger flavor for parties or just a fun afternoon snack. Let’s get cooking!
Why You’ll Love This Butterfinger Puppy Chow Treat
This isn’t just any snack; it’s a flavor adventure! You’ll adore this recipe for so many reasons:
- Incredibly Easy: Seriously, this is an easy Butterfinger puppy chow that comes together in minutes.
- Nostalgic Flavor: It captures that beloved sweet and salty taste you remember.
- Satisfying Crunch: The combination of cereal and real Butterfinger pieces is pure textural bliss.
- Perfect for Sharing: It makes a generous batch, ideal for parties or gatherings.
- Customizable: Easily adjust the amount of Butterfinger or tweak the sweetness.
- Kid-Friendly: Even little helpers can get involved in crushing the candy!
- Ultimate Dog Snack: It’s a fantastic Butterfinger dog snack recipe that’s always a hit.
Butterfinger Puppy Chow Ingredients
Gathering your Butterfinger puppy chow ingredients is the first step to creating these irresistible homemade dog treats with Butterfinger flavor. This recipe uses simple pantry staples along with the star of the show – Butterfinger bars! Here’s what you’ll need:
- 7 cups Rice Chex Cereal – the perfect crispy base that holds up well to the coating.
- 1 cup semi-sweet chocolate chips – for that rich, decadent chocolate layer.
- 1/2 cup creamy peanut butter – essential for that classic puppy chow flavor and smooth coating consistency.
- 1/4 cup salted butter – adds richness and helps create that glossy mixture.
- 1 teaspoon pure vanilla extract – enhances all the other flavors.
- 15 fun-size Butterfinger candy bars, crushed – these are key for that signature crunchy texture and sweet-salty taste throughout the treat.
- 3 fun-size Butterfinger candy bars, chopped for garnish – for an extra pop of Butterfinger goodness and visual appeal.
- 1 1/4 cup powdered sugar, sifted – creates the classic powdery coating that makes puppy chow so addictive.
How to Make Butterfinger Puppy Chow
Get ready for the easiest and most delicious treat! This how to make Butterfinger puppy chow guide will walk you through creating this delightful snack. It’s a truly Butterfinger puppy chow no bake recipe, meaning no oven is required!
- Step 1: First things first, unwrap all 18 fun-size Butterfinger bars. Take 15 of those bars and place them into a heavy-duty Ziploc bag. Now, grab a rolling pin and get to crushing! You want a mix of fine crumbs and small, crunchy pieces. Set these aside. Take the remaining 3 bars and roughly chop them for garnish; set these aside too.
- Step 2: In a microwave-safe bowl, combine the 1 cup semi-sweet chocolate chips, 1/2 cup creamy peanut butter, and 1/4 cup salted butter. Microwave this mixture starting with 60 seconds, then stir well. Continue heating in 30-second intervals, stirring after each, until everything is melted, smooth, and wonderfully glossy. Stir in the 1 teaspoon pure vanilla extract.
- Step 3: Pour the 7 cups Rice Chex Cereal into a very large mixing bowl. This is where the magic starts to happen! Carefully pour the warm, luxurious chocolate-peanut butter mixture evenly over the cereal. Grab a spatula and gently fold everything together. Be patient and thorough; you want every single piece of cereal to be coated in that deliciousness.
- Step 4: Grab a large gallon-sized Ziploc bag and pour in the 1 1/4 cup sifted powdered sugar. Transfer about half of the coated cereal into this bag. Seal the bag tightly, trapping as much air as you can inside. Now, shake it like you mean it! Vigorously shake for about 2-3 minutes, ensuring the cereal is evenly coated in that sweet powder. Carefully tip this batch onto a baking sheet lined with parchment paper. Repeat this entire process with the remaining half of the coated cereal.
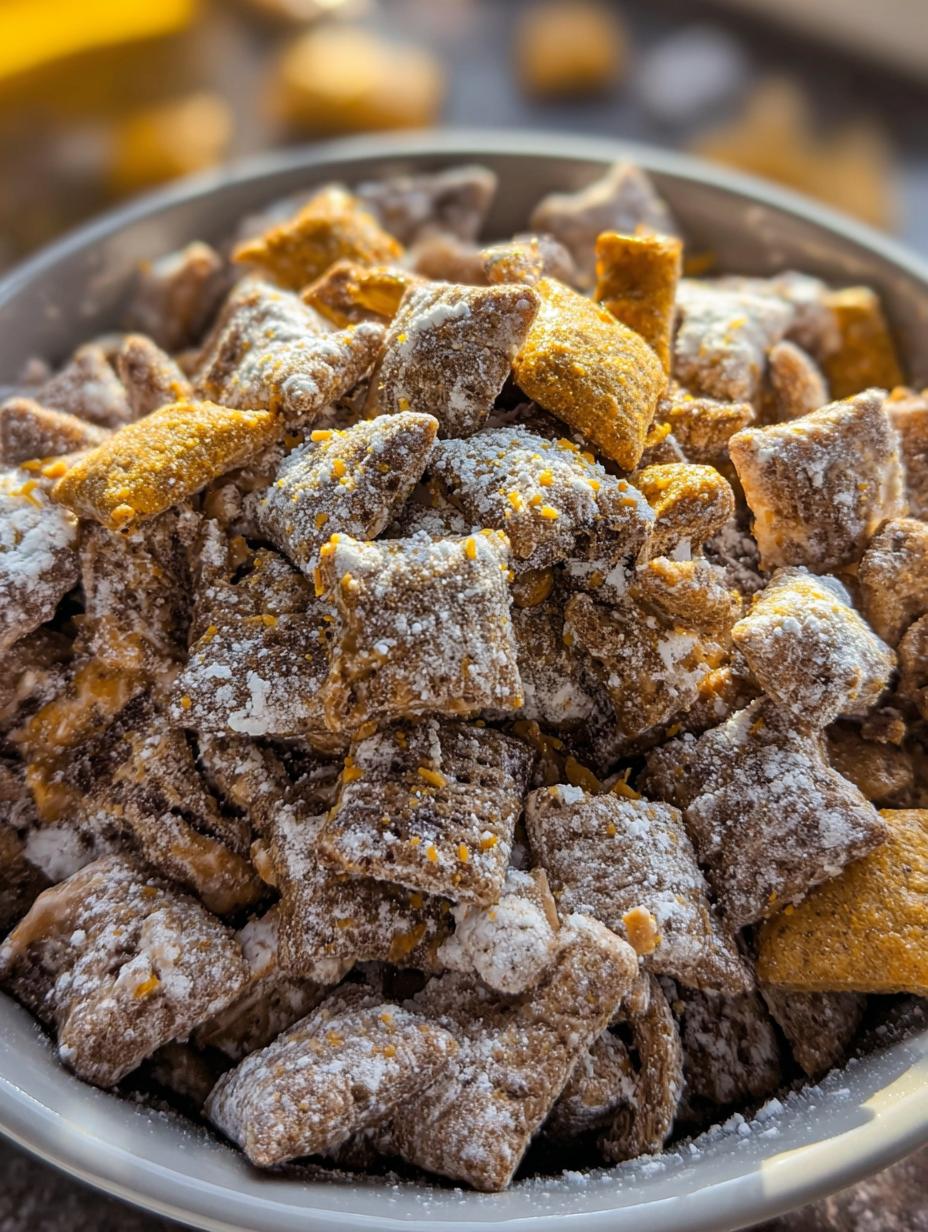
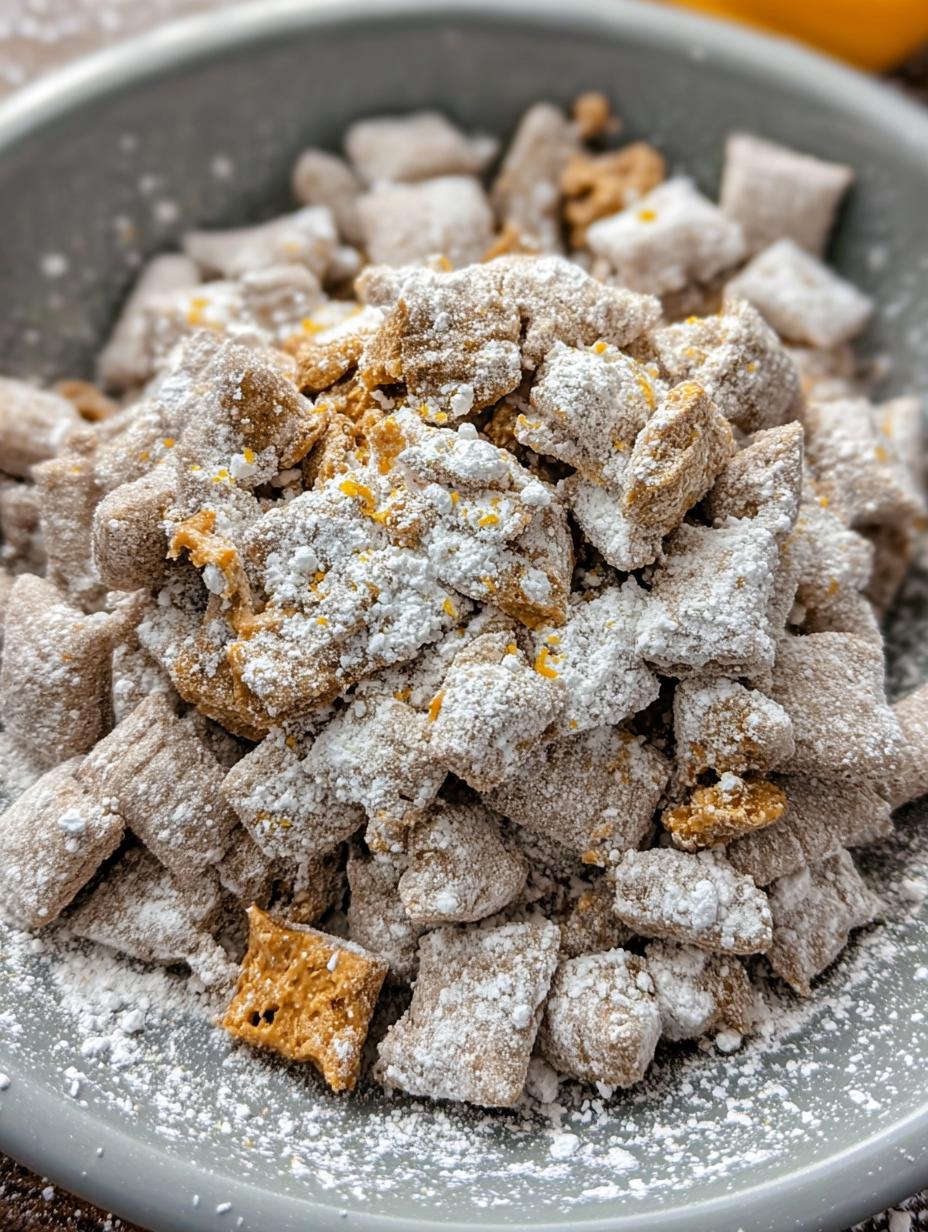
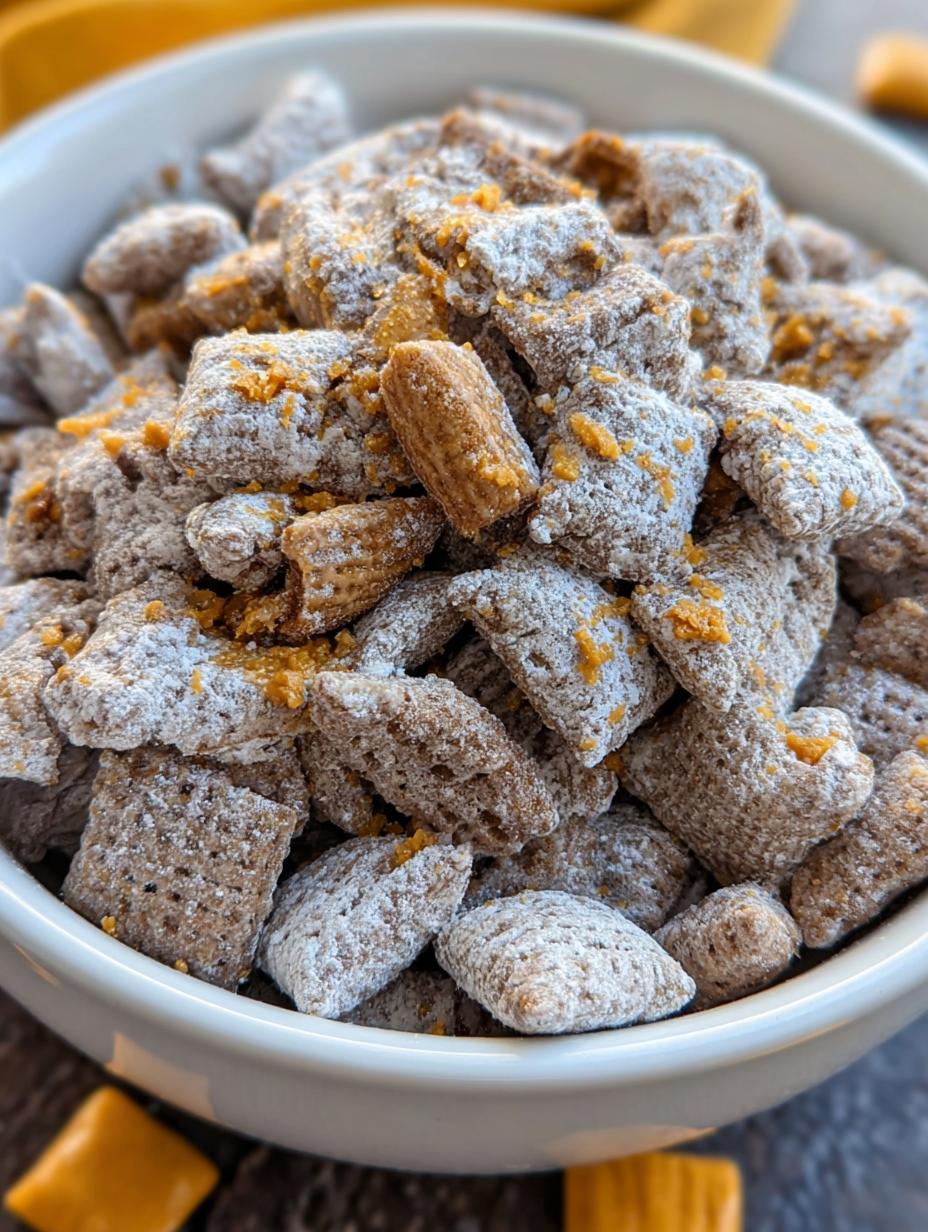
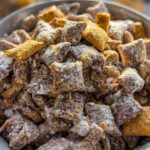
- Step 5: Sprinkle the crushed Butterfinger pieces (from those 15 bars) over the powdered-sugar-coated cereal on your baking sheet. Gently toss everything together with your hands or a spatula to distribute those crunchy Butterfinger bits evenly. Spread the puppy chow out in a single layer on the parchment-lined sheet. Pop it into the refrigerator for at least 30 minutes. This chilling time allows the coating to set up nicely. Before serving, sprinkle the reserved chopped Butterfinger pieces over the top for an extra burst of flavor and texture.
Pro Tips for the Best Butterfinger Puppy Chow Treat
Want to make sure your treat is absolutely perfect? I’ve learned a few tricks over the years to elevate this snack from good to unforgettable. These tips will help you achieve the best Butterfinger puppy chow every single time.
- Use quality peanut butter: A creamy, well-known brand like Jif or Skippy makes a noticeable difference in the smoothness of the coating.
- Don’t overheat the chocolate mixture: Overheated chocolate can seize up, becoming thick and clumpy. Microwave in short bursts and stir frequently.
- Be gentle when coating: Fold the cereal carefully to prevent it from breaking into too many small pieces. You want those nice, intact Chex squares!
- Shake, shake, shake! For that signature powdery finish, really give the bag a good, vigorous shake to ensure every piece is coated evenly.
What’s the secret to perfect Butterfinger puppy chow?
The real secret to perfect homemade Butterfinger puppy chow lies in the texture. You want a good balance of crunchy cereal, smooth coating, and those signature Butterfinger crumbles. Don’t crush the Butterfinger too finely – a mix of crumbs and small pieces gives you the best bite.
Can I make Butterfinger puppy chow ahead of time?
Absolutely! This is a fantastic make-ahead treat. You can prepare the entire batch up to 3-4 days in advance and store it in an airtight container at room temperature. Just make sure it’s completely cooled before sealing it up.
How do I avoid common mistakes with Butterfinger puppy chow?
The most common pitfalls are a clumpy chocolate mixture or uneven coating. To avoid this, always microwave the chocolate, peanut butter, and butter in short intervals, stirring between each. Also, ensure you shake the powdered sugar bag thoroughly for an even distribution.
Best Ways to Serve Butterfinger Puppy Chow Treat
This delightful treat is incredibly versatile! For a party or gathering, serve it in a big bowl as a fun, self-serve snack. The combination of crispy cereal and those irresistible Butterfinger pieces makes it a guaranteed hit. You can also package it up in cute treat bags for party favors or as a sweet surprise for friends and family. Pair it with a cold glass of milk or even a coffee for a grown-up treat. When you’re looking for something special, serving it alongside some fresh fruit can offer a nice contrast. Enjoying this puppy chow with Butterfinger candy is always a delicious experience, no matter how you serve it!
Nutrition Facts for Butterfinger Puppy Chow Treat
This recipe is a decadent treat, and the nutritional information reflects that. Here’s an approximate breakdown per serving (based on 12 servings):
- Calories: Approx. 350-400 kcal
- Fat: Approx. 20-25g
- Saturated Fat: Approx. 8-10g
- Protein: Approx. 5-7g
- Carbohydrates: Approx. 40-45g
- Fiber: Approx. 2-3g
- Sugar: Approx. 30-35g
- Sodium: Approx. 150-200mg
Nutritional values are estimates and may vary based on specific ingredients used, especially the type of peanut butter and the exact size of the Butterfinger pieces.
How to Store and Reheat Butterfinger Puppy Chow Treat
Properly storing your delicious Butterfinger puppy chow treat ensures it stays fresh and crunchy for days. Once you’ve finished making this fantastic Butterfinger puppy chow recipe, the first crucial step is to let it cool completely on the parchment-lined baking sheet. This allows the coating to set properly, preventing it from becoming too sticky.
For storage, transfer the cooled puppy chow into an airtight container. At room temperature, it should stay fresh and delicious for about 3 to 4 days. If you need to keep it longer, you can refrigerate it for up to 1 week. For long-term preservation, this treat freezes beautifully! Place it in a freezer-safe airtight container for up to 1 to 2 months. When you’re ready to enjoy it again, simply let it thaw at room temperature for about 30 minutes. Reheating isn’t usually necessary, as the texture is best enjoyed chilled or at room temperature, but if you prefer it slightly warmer, a few seconds in the microwave can do the trick, though be careful not to melt the coating.
Frequently Asked Questions About Butterfinger Puppy Chow
Is this Butterfinger puppy chow recipe truly easy?
Yes, absolutely! This easy Butterfinger puppy chow is designed for simplicity. It requires no baking and comes together with minimal effort, making it perfect for beginners or when you’re short on time. The most involved part is crushing the candy bars, which is actually quite fun!
Can I use a different type of cereal?
While Rice Chex is traditional for puppy chow and provides a great base, you can experiment. Corn Chex or even Cheerios could work, but they might alter the texture slightly. For the classic taste and texture, sticking to Rice Chex is your best bet for this Butterfinger puppy chow recipe.
What if I can’t find fun-size Butterfinger bars?
No problem! You can easily substitute regular-sized Butterfinger bars. You’ll need about 18 fun-size bars total, so roughly 5-6 regular-sized bars would be equivalent. Just crush about 4-5 for the main mixture and chop 1-2 for garnish. The key is getting that signature Butterfinger crunch!
Can I make this puppy chow healthier?
While this is a treat, you can make slight adjustments. Opt for dark chocolate chips for added antioxidants, or consider using a peanut butter with no added sugar. However, the Butterfinger candy itself is quite sweet, so significant health modifications would change the core flavor profile of this delightful snack.
Variations of Butterfinger Puppy Chow Treat
Looking to switch things up or cater to different needs? This classic treat is wonderfully adaptable! Here are a few fun variations to try, keeping that delicious Butterfinger vibe alive. These ideas can help you create unique Butterfinger inspired dog treats that everyone will love.
- White Chocolate Drizzle: For a sweeter twist, melt some white chocolate chips and drizzle them over the finished puppy chow before serving. It adds a creamy contrast to the classic flavors.
- Spicy Kick: If you like a little heat, add a tiny pinch of cayenne pepper to the chocolate-peanut butter mixture. It sounds unusual, but the subtle warmth can really enhance the sweet and salty notes.
- Gluten-Free Version: Easily make this gluten-free by swapping out the Rice Chex for a gluten-free cereal like Chex Rice or a certified gluten-free corn flake. Just ensure your other ingredients are also gluten-free.
- Butterfinger Bits Bonanza: Don’t have enough Butterfinger bars? Mix in some crushed peanut butter pretzels or even some crunchy peanut butter granola for added texture and complementary flavors.
Butterfinger Puppy Chow: 2 Bags of Delicious Joy
- Total Time: 55 Minutes
- Yield: Approximately 12 servings 1x
- Diet: Vegetarian
Description
This Butterfinger Puppy Chow recipe transforms a classic nostalgic snack into an irresistible treat. It features crispy cereal coated in a rich chocolate-peanut butter mixture, then tossed with powdered sugar and crunchy Butterfinger candy pieces for a unique sweet and salty flavor explosion.
Ingredients
- 7 cups Rice Chex Cereal
- 1 cup semi-sweet chocolate chips
- 1/2 cup creamy peanut butter
- 1/4 cup salted butter
- 1 teaspoon pure vanilla extract
- 15 fun-size Butterfinger candy bars, crushed
- 3 fun-size Butterfinger candy bars, chopped for garnish
- 1 1/4 cup powdered sugar, sifted
Instructions
- Unwrap all 18 Butterfinger bars. Place 15 bars in a heavy-duty Ziploc bag; crush with a rolling pin to a mixture of crumbs and small pieces. Chop the remaining 3 bars for garnish; set aside.
- In a microwave-safe bowl, combine chocolate chips, peanut butter, and butter. Microwave for 60 seconds, stir, then heat in 30-second intervals, stirring until smooth and glossy. Stir in vanilla extract.
- Pour 7 cups of Chex cereal into a very large mixing bowl. Pour the warm chocolate-peanut butter mixture evenly over the cereal. Gently fold with a spatula until all cereal pieces are thoroughly coated.
- Add 1 1/4 cup powdered sugar to a large gallon-sized Ziploc bag. Transfer half of the coated cereal into the bag. Seal, trapping air, and shake vigorously for 2-3 minutes until cereal is evenly coated. Transfer to a parchment-lined baking sheet. Repeat with the remaining cereal.
- Sprinkle the crushed Butterfinger (15 bars) over the powdered-sugar-coated cereal on the baking sheet. Gently toss to combine. Spread the puppy chow in a single layer and chill in the refrigerator for at least 30 minutes until set. Garnish with chopped Butterfinger (3 bars) before serving.
Notes
- Using creamy peanut butter like Jif or Skippy ensures the best consistency.
- Do not overheat the chocolate mixture to prevent it from seizing.
- Gentle folding is key when coating the cereal to avoid breaking it.
- Shake the bag thoroughly for an even powdered sugar coating.
- A variety of crushed Butterfinger textures (crumbs and small pieces) provides the best crunch.
- Spreading on parchment or wax paper prevents sticking.
- Chilling helps the coating firm up for a less sticky treat.
- This Butterfinger puppy chow is best stored in an airtight container at room temperature for up to 3-4 days, or refrigerated for up to 1 week.
- It can also be frozen for up to 1-2 months in a freezer-safe airtight container.
- Prep Time: 20 Minutes
- Cook Time: 3 Minutes
- Category: Dessert/Snack
- Method: No-Bake
- Cuisine: American
Nutrition
- Serving Size: Approximately 1/12th of recipe
- Calories: Approx. 350-400 kcal (estimated)
- Sugar: Approx. 30-35g (estimated)
- Sodium: Approx. 150-200mg (estimated)
- Fat: Approx. 20-25g (estimated)
- Saturated Fat: Approx. 8-10g (estimated)
- Unsaturated Fat: Approx. 12-15g (estimated)
- Trans Fat: 0g (estimated)
- Carbohydrates: Approx. 40-45g (estimated)
- Fiber: Approx. 2-3g (estimated)
- Protein: Approx. 5-7g (estimated)
- Cholesterol: Approx. 15-20mg (estimated)
Keywords: Butterfinger Puppy Chow Treat, Butterfinger puppy chow recipe, Homemade Butterfinger puppy chow, Easy Butterfinger puppy chow, Butterfinger puppy chow ingredients, how to make Butterfinger puppy chow, Butterfinger dog treats recipe, peanut butter puppy chow for dogs, puppy chow with Butterfinger candy, Butterfinger inspired dog treats, homemade dog treats Butterfinger flavor, Butterfinger dog snack recipe, best Butterfinger puppy chow, Butterfinger puppy chow no bake recipe, Butterfinger puppy chow homemade dog biscuits