Mini Halloween Pizzas Spooky have become my absolute favorite way to kick off the fall season! I remember one year, my little niece was visiting right before Halloween, and we decided to make something festive. We pulled out the pizza dough and some black olives, and before I knew it, we were giggling as we turned them into little spider faces and ghost shapes. The smell of baking dough and melting cheese filled the house, and seeing her eyes light up with joy made it even more special. These aren’t just pizzas; they’re little edible memories. They make the perfect Kids Halloween Treats and are so much fun to create together. Let’s get cooking!
Why You’ll Love These Mini Halloween Pizzas Spooky
These little pizzas are a guaranteed hit for so many reasons:
- Incredible Taste: Crispy crust, tangy sauce, and gooey cheese – what’s not to love?
- Super Speedy Prep: Perfect for busy weeknights, these are truly Easy Halloween Recipes.
- Kid-Approved Fun: They’re not just delicious, they’re also a blast for little hands to help create.
- Budget-Friendly: Using simple ingredients makes this a cost-effective treat for parties.
- Versatile Toppings: You can customize them endlessly with your favorite spooky designs.
- Great for Parties: These bite-sized delights are perfect Halloween Party Food for guests of all ages.
- Healthy-ish Option: You control the ingredients, making them a slightly healthier alternative to other snacks.
- Engaging Activity: They offer a fun, hands-on experience that doubles as an Easy Halloween Recipe for the whole family.
Ingredients for Your Spooky Mini Pizzas
Gathering these yummy ingredients is the first step to creating fantastic Halloween Party Food. I love how simple they are, making the whole process a breeze!
- 1 ¾ cups warm water – crucial for activating the yeast
- 2 ¼ teaspoons active dry yeast – the magic behind fluffy dough
- 1 tablespoon granulated sugar – feeds the yeast for a good rise
- 1 teaspoon sea salt – adds flavor and controls yeast activity
- 2 tablespoons olive oil – for a tender crust
- 4 ½ cups all-purpose flour – the base of our pizza dough
- 1 (28-ounce) can crushed tomatoes – the heart of our delicious pizza sauce
- 2 cloves garlic, minced – for that essential savory kick
- 1 teaspoon dried oregano
- ½ teaspoon dried basil – classic Italian herb flavors
- ¼ teaspoon red pepper flakes (optional) – for a tiny touch of heat
- 1 teaspoon sugar (optional) – balances the acidity of the tomatoes
- Salt and pepper to taste – to perfect the sauce flavor
- 1 tablespoon olive oil – for sautéing the garlic
- 1 (16-ounce) package low-moisture, part-skim mozzarella cheese, shredded – melts beautifully for that gooey cheese layer
- ½ cup fresh mozzarella cheese, thinly sliced or shredded – adds a creamy texture and lovely flavor
- 1 (3.8-ounce) can sliced black olives, drained – perfect for creating spooky spider eyes or other faces
- 1 red bell pepper – for colorful decorations like pumpkins or hats
- 1 green bell pepper – adds more fun shapes and color
- 6-8 slices pepperoni – great for cutting into bat shapes or other Halloween designs
- Small cookie cutters with Halloween shapes (optional) – for extra spooky dough or topping cut-outs
- Fresh basil leaves (optional) – for a pop of green and fresh flavor
How to Make These Spooky Mini Pizzas
Making these Spooky Mini Pizzas is a fun process that fills your kitchen with delicious aromas. It’s more than just a recipe; it’s a chance to get creative and craft some truly memorable DIY Halloween Pizzas.
- Step 1: Activate Yeast: In a large bowl, combine 1 ¾ cups warm water with 1 tablespoon granulated sugar. Sprinkle 2 ¼ teaspoons active dry yeast over the top. Let this mixture sit undisturbed for about 5-10 minutes until it becomes nice and foamy. This shows your yeast is alive and ready to work its magic!
- Step 2: Combine Dough Ingredients: To the activated yeast mixture, add 2 tablespoons olive oil and 1 teaspoon sea salt. Gradually start adding in the 4 ½ cups all-purpose flour, mixing as you go. You’ll want to mix until a shaggy dough starts to form.
- Step 3: Knead Dough: Turn the shaggy dough out onto a lightly floured surface. Knead it by hand for about 8-10 minutes, or use a stand mixer with a dough hook for 6-8 minutes. You’re looking for a dough that is smooth, soft, and elastic to the touch.
- Step 4: First Rise: Lightly grease a clean bowl with a little olive oil. Place the kneaded dough into the bowl, turning it once to coat. Cover the bowl with plastic wrap or a clean kitchen towel and let it rise in a warm spot for 1 to 1 ½ hours. It should double in size, looking puffy and inviting.
- Step 5: Prepare Sauce: While the dough rises, let’s make the sauce! Heat 1 tablespoon olive oil in a saucepan over medium heat. Add the 2 cloves minced garlic and sauté until fragrant, about 30 seconds. Pour in the 1 (28-ounce) can crushed tomatoes, along with 1 teaspoon dried oregano, ½ teaspoon dried basil, and optional ¼ teaspoon red pepper flakes and 1 teaspoon sugar. Stir everything together. Let it simmer gently for 15-20 minutes to allow the flavors to meld. Season with salt and pepper to taste. The aroma will be amazing!
- Step 6: Preheat Oven: Once your dough has risen and your sauce is ready, it’s time to get the oven fired up! Preheat your oven to 425°F (220°C). Line a couple of baking sheets with parchment paper for easy cleanup.
- Step 7: Shape Dough Bases: Punch down the risen dough. Turn it onto your floured surface and divide it into 12-16 equal pieces. Roll each piece into a smooth ball. Then, take each ball and roll it out into a 2-3 inch circle, about ¼-inch thick. These will be the bases for your DIY Halloween Pizzas. Place them on the prepared baking sheets.
- Step 8: Assemble Pizzas: Now for the fun part! Spoon about 1-2 tablespoons of your homemade spooky pizza sauce onto each dough circle, leaving a small border for the crust. Sprinkle generously with the 1 (16-ounce) package shredded mozzarella cheese.
Step-by-Step Pizza Assembly
This is where the magic happens! Let’s dive into how to decorate mini pizzas for Halloween and make them truly spooktacular.
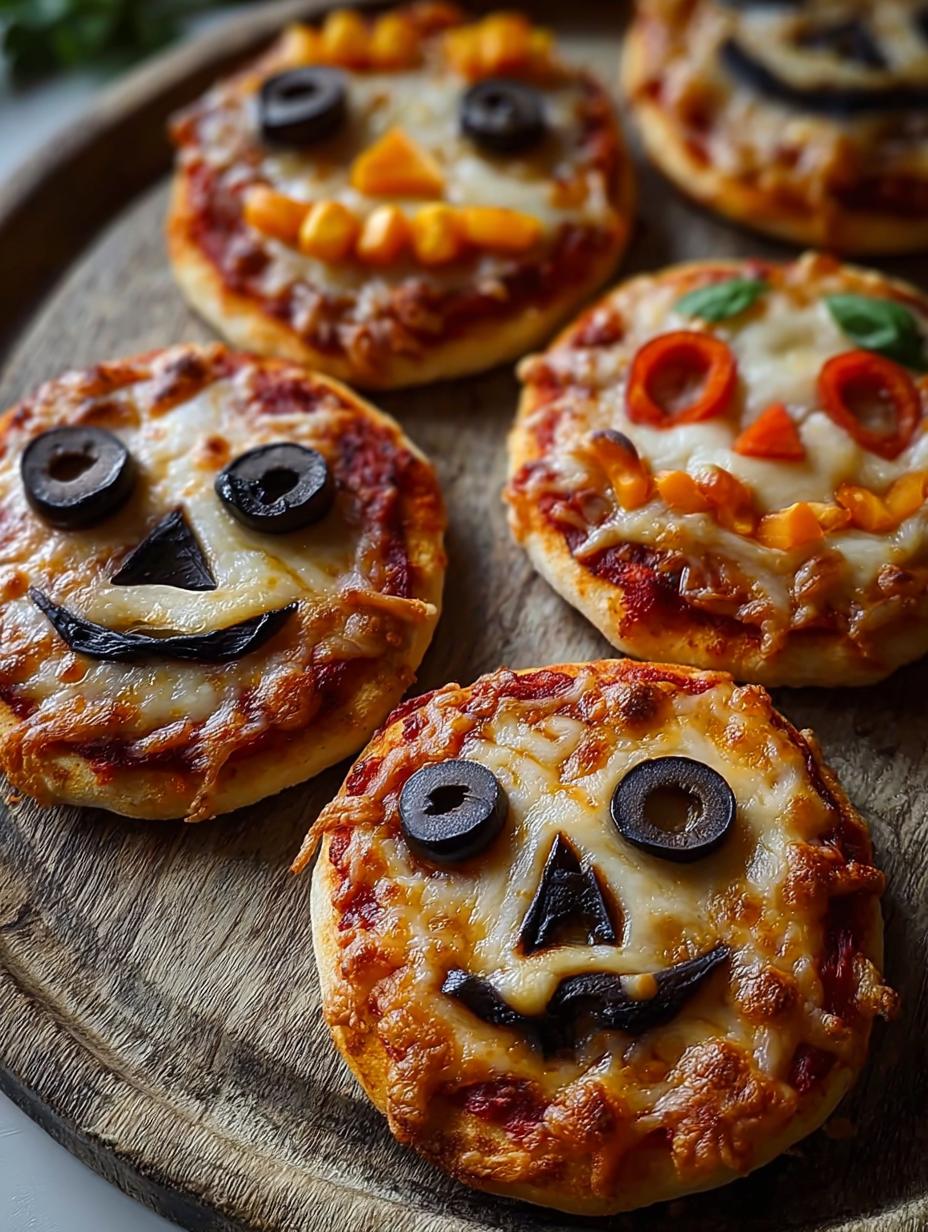
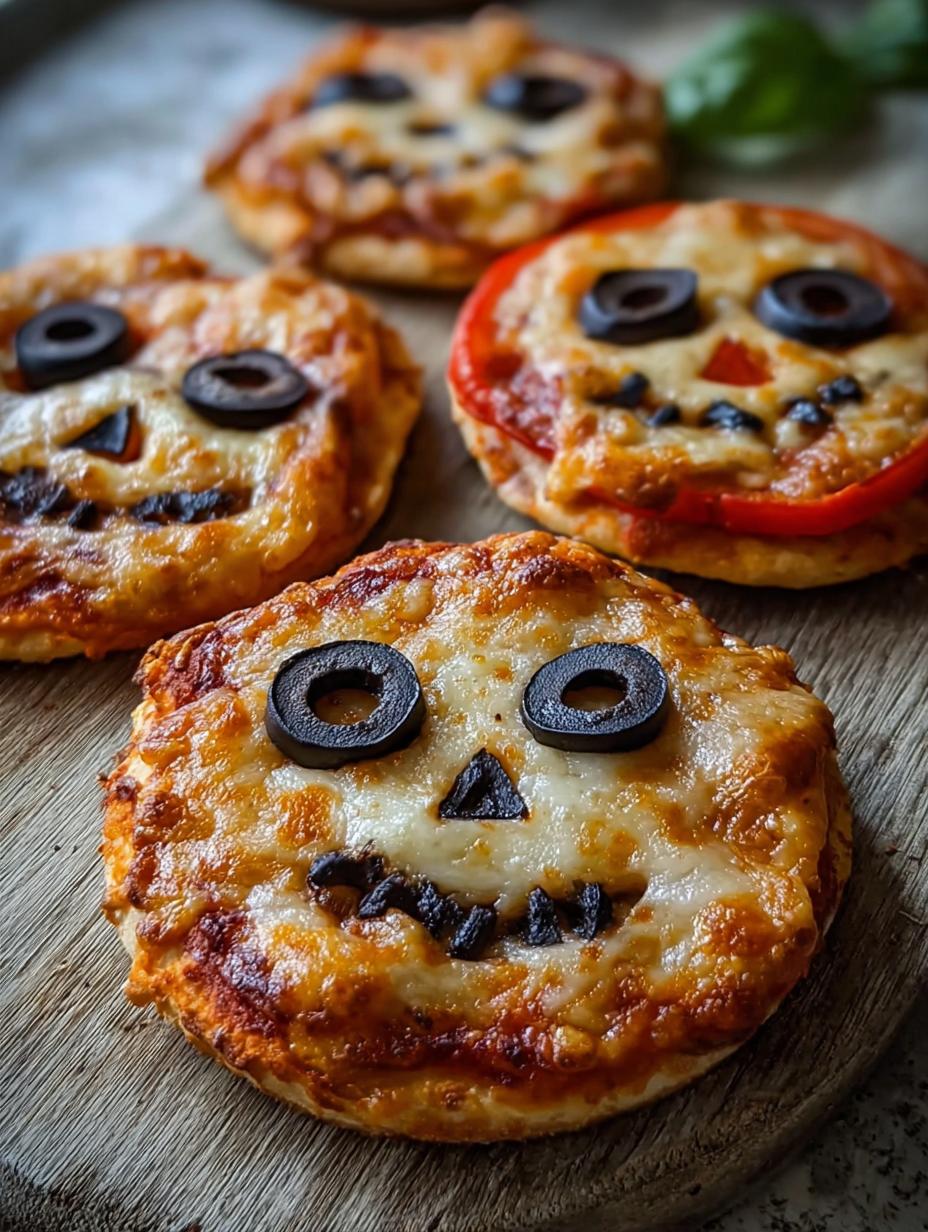
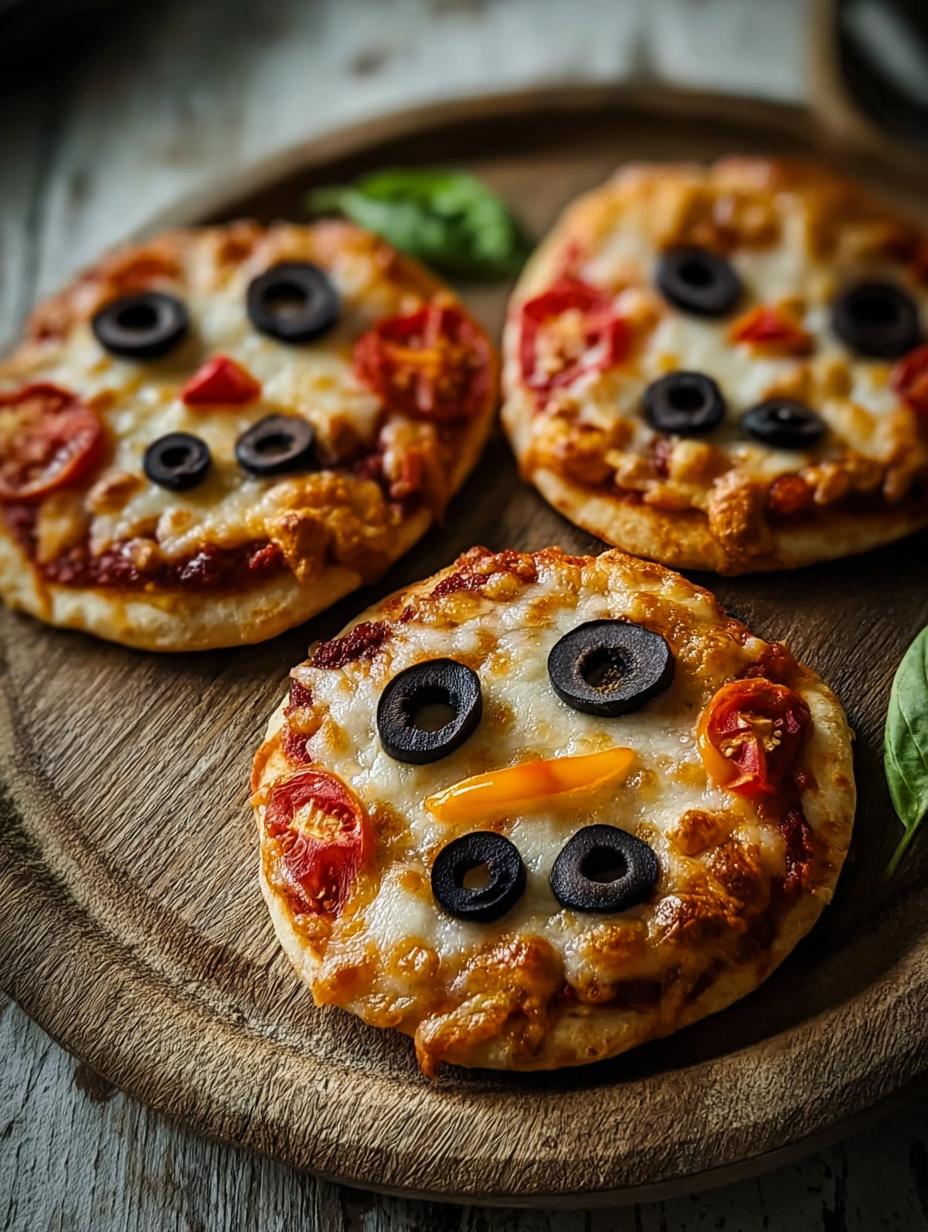
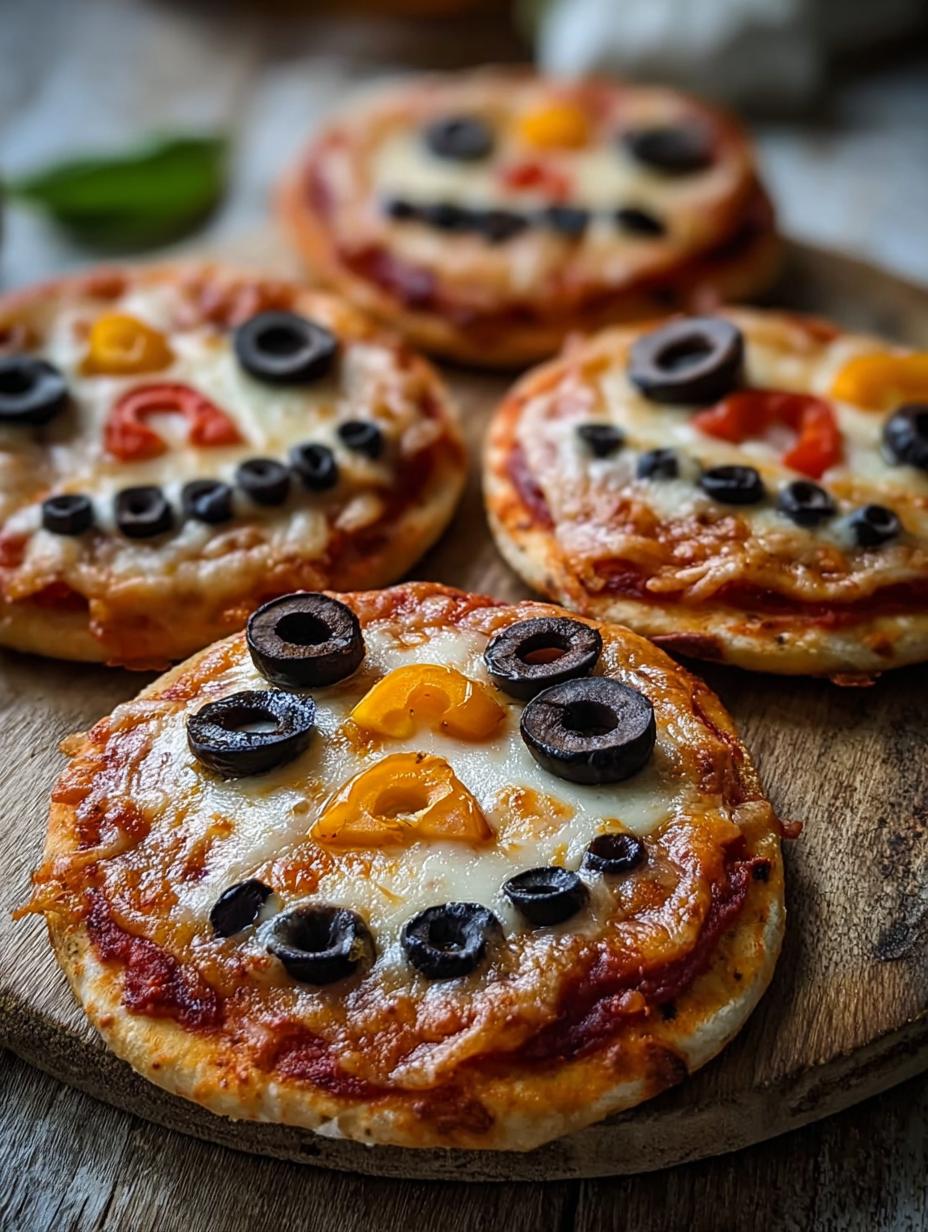
Creating Spooky Faces and Shapes
Use the ½ cup fresh mozzarella cheese to create ghostly figures or mummy wraps. Thinly slice or shred it and get creative! For spider pizzas, place drained sliced black olives strategically – two larger ones for the body and smaller pieces for legs and eyes. You can also use pieces of the red bell pepper and green bell pepper to fashion pumpkin faces, pointy witch hats, or eerie mouths. Tiny slivers of pepperoni can become bat wings or eerie grins.
Using Halloween Cookie Cutters
If you have small Halloween-themed cookie cutters, now’s the time to use them! You can press them into the dough bases before adding toppings to create fun shapes. Alternatively, use them to cut out shapes from the bell peppers, fresh mozzarella, or even pepperoni slices. This is a fantastic way to add extra detail and ensure your Halloween themed mini pizzas are perfectly festive.
- Step 9: Add Toppings: Arrange your prepared toppings onto the cheese. Go wild with your spooky designs!
- Step 10: Bake Pizzas: Place the baking sheets into the preheated oven. Bake for 10-14 minutes, or until the crust is golden brown and the cheese is wonderfully bubbly and melted. If your oven bakes unevenly, rotate the sheets halfway through.
- Step 11: Cool and Serve: Carefully remove the pizzas from the oven. Let them cool on the baking sheet for just a minute or two; this helps the cheese set slightly. Transfer them to a wire rack to cool a bit more. Garnish with fresh basil leaves if you like. Serve these delightful Spooky Pizzas warm and watch them disappear!
Pro Tips for the Best Mini Halloween Pizzas Spooky
I’ve made these little pizzas countless times, and I’ve picked up a few tricks to make them absolutely perfect. These tips will help elevate your Spooky Mini Pizzas from good to spooktacular!
- Always use warm, not hot, water for the yeast. Too hot and it dies; too cool and it won’t activate properly, leading to dense dough.
- Don’t overload the pizzas with sauce or toppings. Too much moisture will make the crust soggy, and nobody wants a sloppy pizza base.
- Let the dough rise in a slightly warm place – like a lightly warmed oven (turned off!) or near a sunny window. This ensures a light and airy crust.
- Get creative with your spooky designs! The fun is in the decorating, so don’t be afraid to experiment with different topping arrangements.
What’s the secret to perfect spooky pizza dough?
The real secret for perfect dough in these Mini pizza recipes Halloween spooky lies in proper kneading and rising. Kneading develops gluten for that chewy texture, and a full rise gives it a light, airy crumb. Don’t rush these steps!
Can I make mini Halloween pizzas ahead of time?
Yes! You can prepare the dough balls and store them covered in the refrigerator for up to 24 hours. You can also assemble the pizzas (sauce, cheese, toppings) up to a few hours ahead and keep them chilled, but bake them just before serving for the best crispy crust. For more tips on making food ahead, check out these meal prep ideas.
How do I avoid common mistakes with spooky mini pizzas?
Avoid under-proofing the dough; it needs that full rise. Also, be careful not to over-sauce or over-top them, as this can lead to a soggy bottom. Lastly, ensure your oven is fully preheated to the correct temperature so they bake quickly and evenly. Understanding oven temperatures is key to baking success; learn more about oven calibration.
Best Ways to Serve Your Spooky Mini Pizzas
These delightful Spooky Mini Pizzas are so versatile, they’re perfect for a Halloween party buffet or a fun family dinner. I love serving them warm right out of the oven, maybe alongside some “witch finger” pretzel sticks or a “graveyard” dip. They’re also fantastic as part of a larger spread of Spooky Snacks, alongside other Halloween-themed treats like ghost meringues or pumpkin hummus. Don’t forget a big bowl of popcorn or some veggie sticks for variety! These little pizzas are sure to be the star of any spooky gathering.
Nutrition Facts for Mini Halloween Pizzas Spooky
When you’re whipping up these fun Spooky Mini Pizzas, it’s helpful to have an idea of the nutritional breakdown. Keep in mind that the exact figures can vary quite a bit depending on your chosen toppings, especially things like extra cheese or pepperoni!
- Calories: Approx. 150-200 per mini pizza
- Fat: Approx. 7-10g
- Saturated Fat: Approx. 3-5g
- Protein: Approx. 7-10g
- Carbohydrates: Approx. 15-20g
- Fiber: Approx. 1-2g
- Sugar: Approx. 3-5g
- Sodium: Approx. 300-400mg
Nutritional values are estimates and will vary based on specific ingredients and toppings used.
How to Store and Reheat Your Spooky Mini Pizzas
Don’t let any delicious leftover Halloween pizza go to waste! Storing and reheating these Spooky Mini Pizzas is super simple. First, make sure they’ve cooled down completely. I like to let them sit on a wire rack for at least 30 minutes to ensure they’re not warm when packed. For fridge storage, place cooled pizzas in an airtight container or wrap them tightly in plastic wrap. They’ll stay fresh and tasty for about 3 to 4 days. If you want to keep them even longer, freezing is a great option. Wrap each mini pizza securely in plastic wrap, then in aluminum foil, and pop them into a freezer-safe bag. They can stay frozen for up to 3 months.
To reheat, you have a few great options. For the best crispy crust, I highly recommend using your oven or a toaster oven. Place the pizzas on a baking sheet and heat at around 350°F (175°C) for 5-8 minutes, or until the cheese is melty and the crust is warm. If you’re in a real hurry, a microwave will work, but the crust might be a little softer. Just heat for 30-60 seconds, checking frequently. For more reheating tips, consider these food preservation techniques.
Frequently Asked Questions About Spooky Mini Pizzas
Can I make the dough for these mini Halloween pizzas ahead of time?
Absolutely! You can make the dough a day in advance. After the first rise, punch it down, divide it into balls, cover them tightly, and refrigerate. Let them sit at room temperature for about 30 minutes before shaping to make them easier to work with. This makes assembling your Halloween themed mini pizzas even quicker on party day!
What are some other fun topping ideas for spooky mini pizzas?
Beyond olives and peppers, consider using small pieces of pepperoni to create bat shapes, or strips of mozzarella to make mummy faces with two olive “eyes.” You can also use small cookie cutters to make shapes out of cheese slices or bell peppers. Don’t be afraid to get creative with your designs to make your Halloween themed mini pizzas truly unique!
Are these mini Halloween pizzas suitable for picky eaters?
Yes, they are fantastic for picky eaters! The mini size is appealing, and kids love being able to choose their own toppings. You can keep some plain with just sauce and cheese, or let them decorate their own. It’s a fun way to introduce them to new ingredients in a familiar format, making them a great option for even the fussiest eaters. For more ideas on picky eaters, see these tips for dealing with picky eaters.
What’s the best way to cut these spooky mini pizzas for a party?
Since they are already mini, they’re perfect for individual servings. If you need to cut them smaller for very young children or to offer more variety, use a sharp knife or a pizza cutter. You can cut them in half or even quarters. Just be gentle so you don’t squish your spooky designs!
Variations of Mini Halloween Pizzas You Can Try
Once you’ve mastered the basic recipe, I love experimenting with different Spooky Halloween pizza variations to keep things fresh and fun. These ideas are perfect for accommodating different tastes or just adding a new twist to your Halloween spread.
- Gluten-Free Spooky Pizzas: Easily make these gluten-free by using your favorite gluten-free pizza dough or pre-made crusts. You can also find gluten-free breadcrumbs to use in the dough recipe if making from scratch.
- Vegan Halloween Treats: For a vegan option, use a dairy-free pizza dough recipe and top with vegan shredded mozzarella and your favorite veggie toppings. Nutritional yeast can add a cheesy flavor boost.
- “Mummy” Garlic Bread Pizzas: Instead of tomato sauce, spread a garlic butter mixture over the dough bases. Top with strips of mozzarella to create mummy bandages and olive slices for eyes for a different kind of spooky look.
- “Spicy Spiderweb” Pizzas: For a bit of heat, add a pinch of cayenne pepper to the sauce. Then, use a thin stream of sour cream or ranch dressing to create a spiderweb design over the cheese before baking.

Mini Halloween Pizzas Spooky: 13 Fun Recipes
- Total Time: 32-34 Minutes
- Yield: 12-16 Mini Pizzas
- Diet: Vegetarian
Description
Create spooky and fun mini Halloween pizzas that are perfect for kids and parties. This recipe offers a delightful and easy way to celebrate the season with charming, bite-sized treats.
Ingredients
- For the Pizza Dough: 1 ¾ cups warm water, 2 ¼ teaspoons active dry yeast, 1 tablespoon granulated sugar, 1 teaspoon sea salt, 2 tablespoons olive oil, 4 ½ cups all-purpose flour
- For the Spooky Pizza Sauce: 1 (28-ounce) can crushed tomatoes, 2 cloves garlic minced, 1 teaspoon dried oregano, ½ teaspoon dried basil, ¼ teaspoon red pepper flakes (optional), 1 teaspoon sugar (optional), salt and pepper to taste, 1 tablespoon olive oil
- For the Cheesy Layer: 1 (16-ounce) package low-moisture, part-skim mozzarella cheese shredded, ½ cup fresh mozzarella cheese thinly sliced or shredded
- For the Halloween Toppings: 1 (3.8-ounce) can sliced black olives drained, 1 red bell pepper, 1 green bell pepper, 6-8 slices pepperoni, Small cookie cutters with Halloween shapes (optional), Fresh basil leaves (optional)
Instructions
- Activate Yeast: In a large bowl, combine warm water and sugar. Sprinkle yeast over top and let sit for 5-10 minutes until foamy.
- Combine Ingredients: Add olive oil and salt to the yeast mixture. Gradually add flour, mixing until a shaggy dough forms.
- Knead Dough: Knead by hand for 8-10 minutes or with a stand mixer for 6-8 minutes until smooth and elastic.
- First Rise: Place dough in a lightly greased bowl, cover, and let rise in a warm place for 1 to 1 ½ hours, or until doubled in size.
- Divide Dough: Punch down dough, turn onto a floured surface, and divide into 12-16 equal pieces. Roll each piece into a smooth ball and cover while working.
- Prepare Sauce: Heat olive oil in a saucepan, sauté garlic, add crushed tomatoes and seasonings. Simmer for 15-20 minutes and season to taste.
- Shape Toppings: Cut fresh mozzarella into ghost shapes. Cut red and green bell peppers into pumpkin, horn, hat, or mouth shapes. Drain and prepare black olives for spiders or eyes. Cut pepperoni into bat shapes if desired.
- Preheat Oven: Preheat oven to 425°F (220°C). Line baking sheets with parchment paper.
- Roll Bases: On a floured surface, roll dough balls into 2-3 inch circles, about ¼-inch thick. Place on prepared baking sheets.
- Assemble Pizzas: Spoon 1-2 tablespoons of sauce onto each base, leaving a border. Sprinkle with shredded mozzarella.
- Add Toppings: Decorate with mozzarella ghosts, bell pepper shapes, olive spiders, pepperoni bats, or create mummy pizzas with mozzarella strips and olive eyes.
- Bake Pizzas: Bake for 10-14 minutes, or until crust is golden and cheese is bubbly. Rotate sheets halfway if needed.
- Cool and Serve: Let pizzas cool on the baking sheet for 1-2 minutes, then transfer to a wire rack. Serve warm. Garnish with fresh basil if desired.
Notes
- Ensure yeast is active by checking for foam.
- Do not over-sauce pizzas to prevent sogginess.
- Adjust baking time based on your oven.
- Get creative with topping arrangements for unique spooky designs.
- Consider using small Halloween-themed cookie cutters for toppings and dough bases.
- Prep Time: 20 Minutes
- Cook Time: 12-14 Minutes
- Category: Appetizer
- Method: Baking
- Cuisine: Italian-American
Nutrition
- Serving Size: 1 Mini Pizza
- Calories: Approx. 150-200 (will vary based on toppings)
- Sugar: Approx. 3-5g
- Sodium: Approx. 300-400mg
- Fat: Approx. 7-10g
- Saturated Fat: Approx. 3-5g
- Unsaturated Fat: Approx. 4-5g
- Trans Fat: 0g
- Carbohydrates: Approx. 15-20g
- Fiber: Approx. 1-2g
- Protein: Approx. 7-10g
- Cholesterol: Approx. 15-20mg
Keywords: Mini Halloween Pizzas, Spooky Pizzas, Halloween Party Food, Kids Halloween Treats, Easy Halloween Recipes, DIY Halloween Pizzas, Spooky Snacks